


What is Nginx Server?
Nginx (pronounced "engine x") is a popular open-source web server software that is designed to handle high-traffic websites and applications. It is known for its high performance, reliability, scalability, and low resource consumption. It is a web server used for serving static web files 📂. It is commonly used as a reverse proxy server, load balancer, indexing and HTTP cache. It can also be used as a front-end web server or as a proxy for Apache or other web servers. It also has robust security features and can be easily integrated with other tools and technologies such as SSL/TLS encryption, HTTP/2, and Docker.
What is Reverse Proxy?
Reverse Proxy: server that sits between client devices (such as web browsers) and a web server.
It receives requests from clients, processes them, and forwards them to the web server, which response back through the reverse proxy to the client. This way, the client never directly communicates with the web server, keeping the server's true location hidden and providing additional security and performance benefits.
Features of Nginx
High-performance: Nginx is designed to handle a large number of concurrent connections with low memory usage and high efficiency.
Scalability: It is designed to be highly scalable, allowing it to handle large volumes of traffic and requests.
Load balancing: Nginx can distribute incoming traffic across multiple servers, helping to balance the load and improve performance.
Reverse proxy: Nginx can act as a reverse proxy, enabling it to handle requests and route them to appropriate backend servers.
Caching: Nginx can cache content in memory or on disk, reducing the load on backend servers and improving performance for users.
Security: Nginx includes a variety of security features, such as SSL/TLS support, access controls, and HTTP/2 support.
Easy to configure: Nginx is easy to configure and can be customized to meet the specific needs of different applications.
Overall, Nginx is a versatile and powerful web server that can handle a variety of use cases, from small websites to large-scale applications.
Step-by-step Implementation
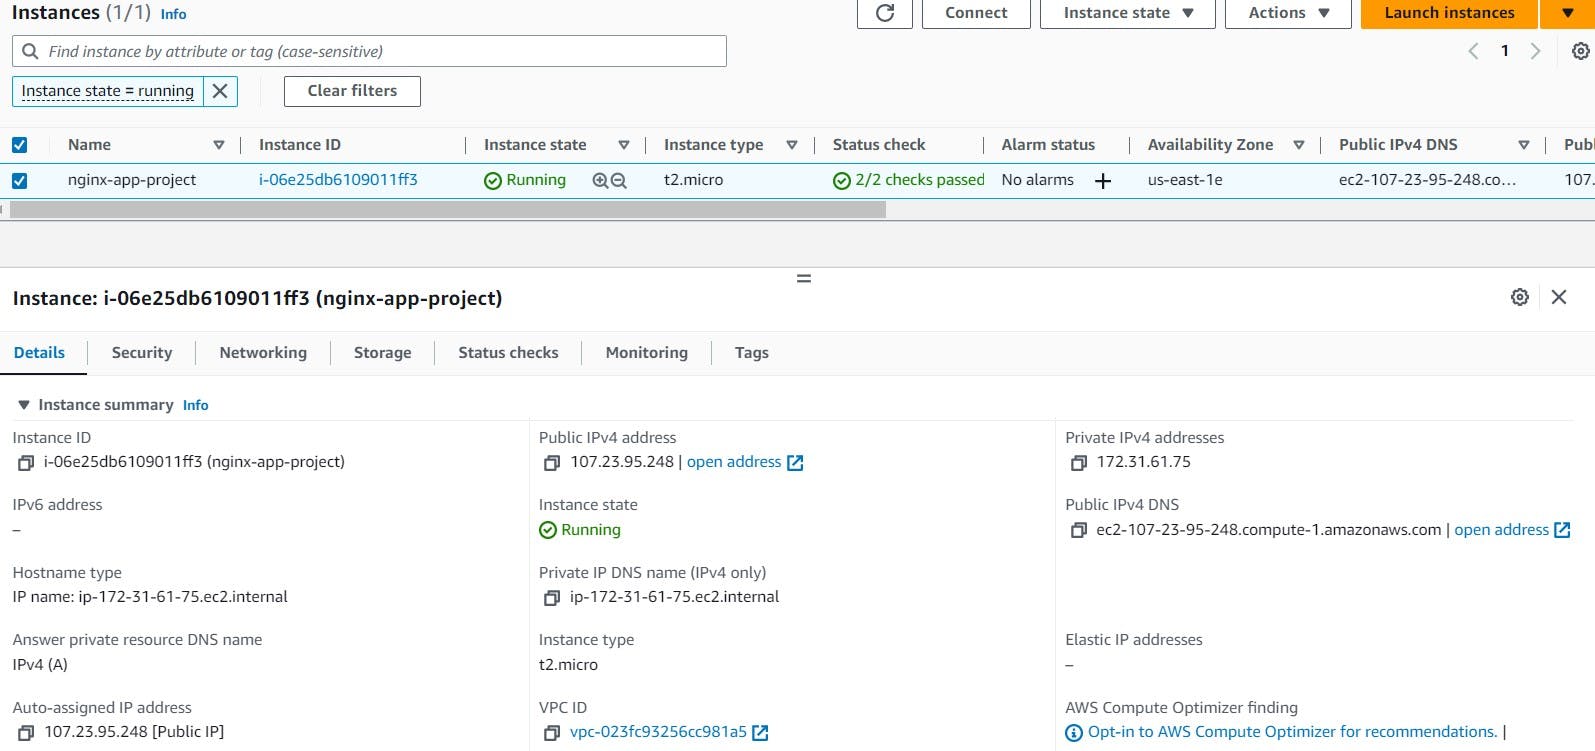
Step 1: Launch an instance named nginx-app-project with Ubuntu AMI, t2.micro instance type, and make sure to add inbound traffic rules for HTTP, and HTTPS in addition to SSH.
Connect this instance and update the server.
sudo apt-get update
Step 2: Install Nginx on this server by using the following command.
sudo apt install nginx -y
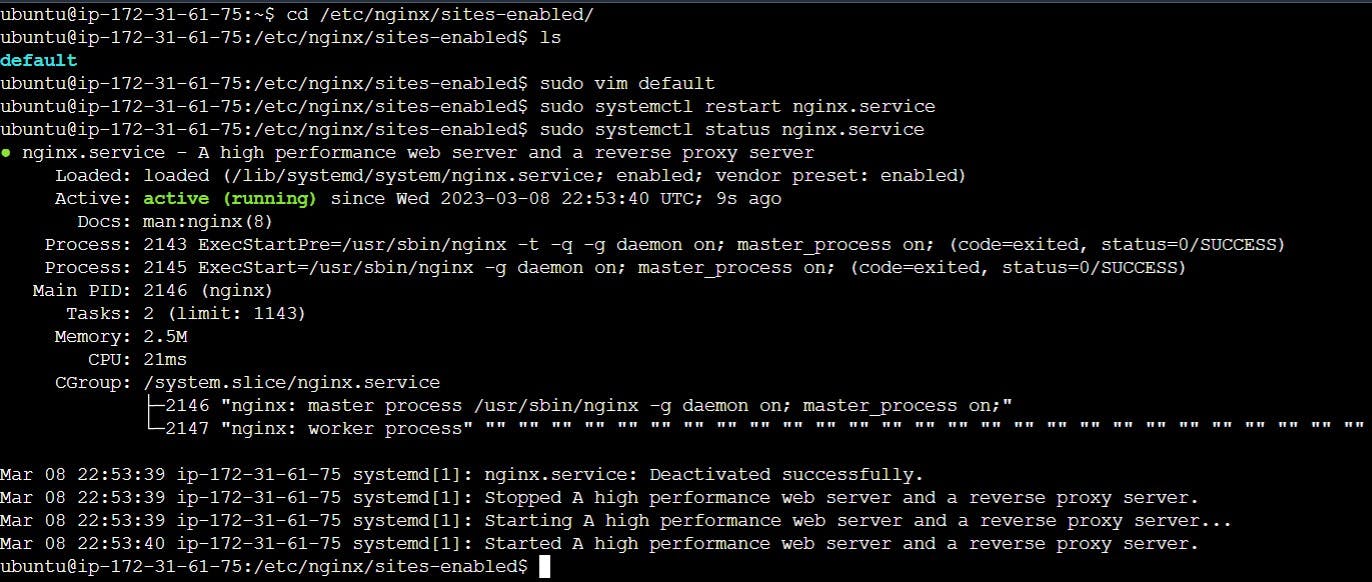
Also, check the status of the Nginx server as shown below.
sudo systemctl status nginx

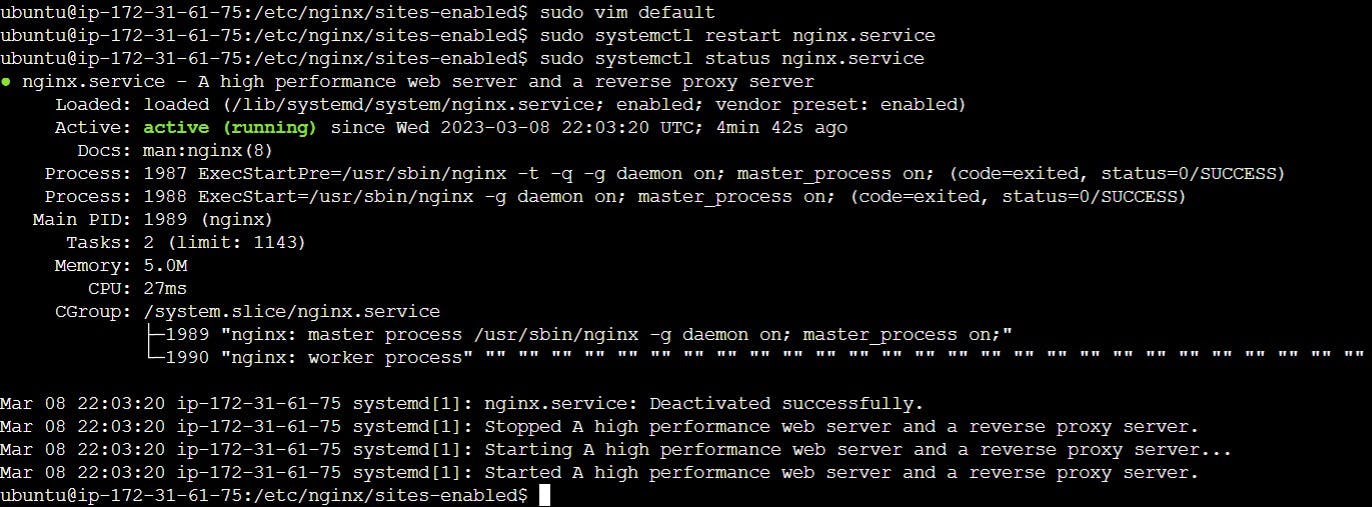
Want to restart the server, then use these commands (optional).
sudo systemctl restart nginx
sudo systemctl status nginx

Step 3: To check the working status of the Nginx server, copy and paste the Public IP of the instance over the address bar.

Step 4: We can view the homepage details stored in the index file on its path /var/www/html.
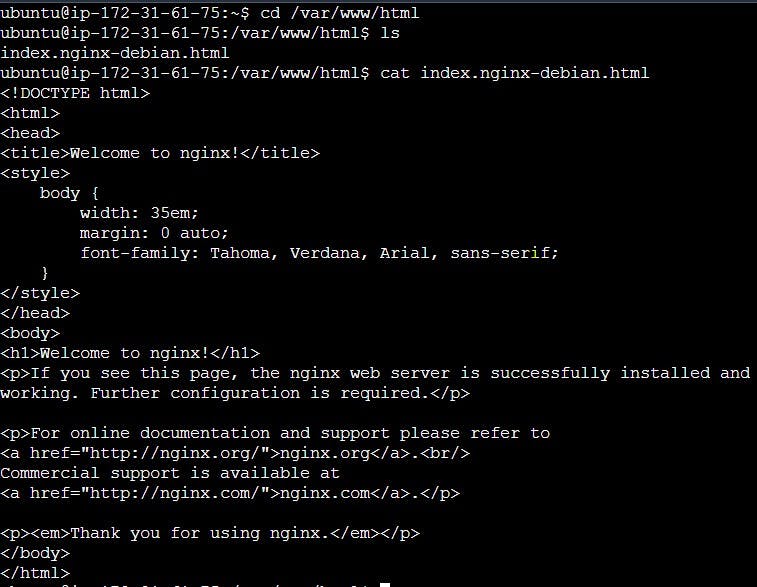
Step 5: Installation and configuration files of the Nginx server can be seen at /etc/nginx path where
nginx.conf is the configuration file of the Nginx Server.
sites-enabled and sites-available are responsible for website deployment and configuration respectively.

Step 6: To better understand the concept of static web files serving feature of the Nginx server, create another index file with different HTML codes.
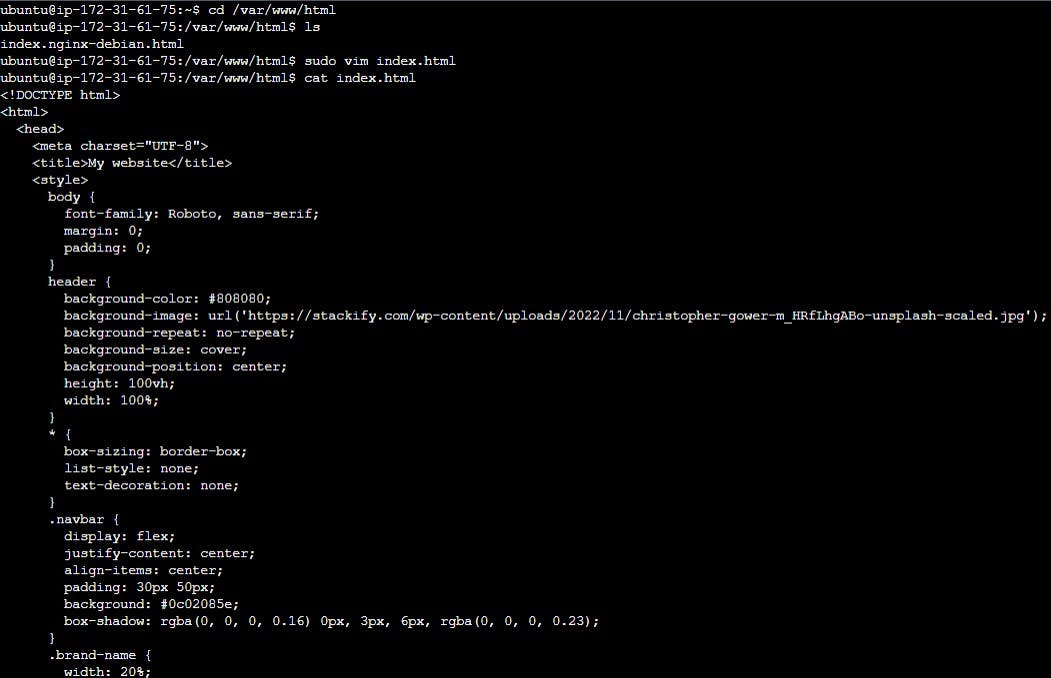
See this home page will be updated as shown in this image.

Step 7: Let's start the amazing part of this project by cloning the source code to this server using Git.

Step 8: Then Install docker in this server by using the following command & also check its version by the command docker --version.
sudo apt install docker.io -y
#To get the root permissions, we add current login user in the docker group.
sudo usermod -aG docker $USER
sudo reboot

Rebooting takes a few minutes, afterwards go to the source code and modify the Dockerfile and save it.

Now build the docker image by using the command docker build -t . <image-name>


Next, run the container from this image using
docker run -d -p <internal-ip>:<external-ip> <image-name>:latest
Also, check the note app working over the local system by using curl -L <local_url>:<External-Ip>

Step 9: Frontend (Home Page)
Run this application through the Reverse Proxy, not by exposing its external IP publicly on the browser. So get inside the/etc/nginx folder 📂 & switched to the 'sites-enabled' folder which is only responsible for web deployment. Edit the default file present inside it.

Here location / is for the frontend page of the server and we just added
proxy_pass http://127.0.0.1:9000; & save it.

After this, restart the server for updating the change details and then paste the Public IP on the browser.

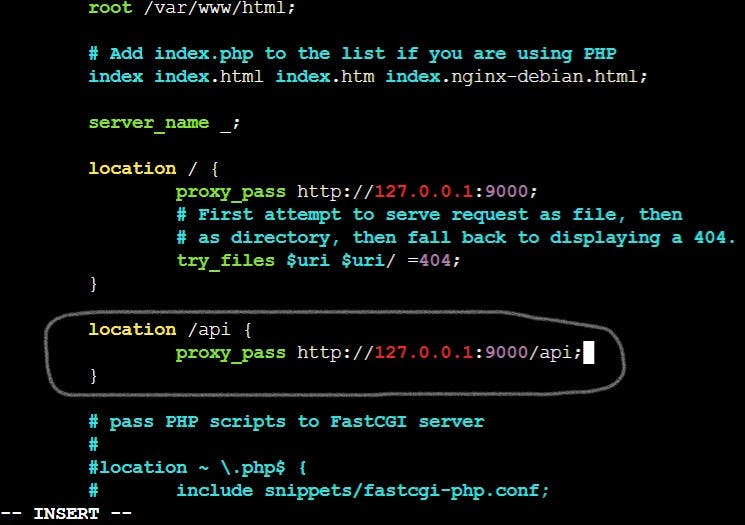
Step 10: Backend (Database)
The application is now ready but the source code is not updated in the backend to store the data. For this, copy the source code to the Nginx root folder /var/www/html


Step 11: Again check the app backend working locally by using curl -L <local_url>:<external-ip>/api

Here we added location /api for the backend page of the server.
Add proxy_pass http://127.0.0.1:9000/api; & then save it. Restart the service.
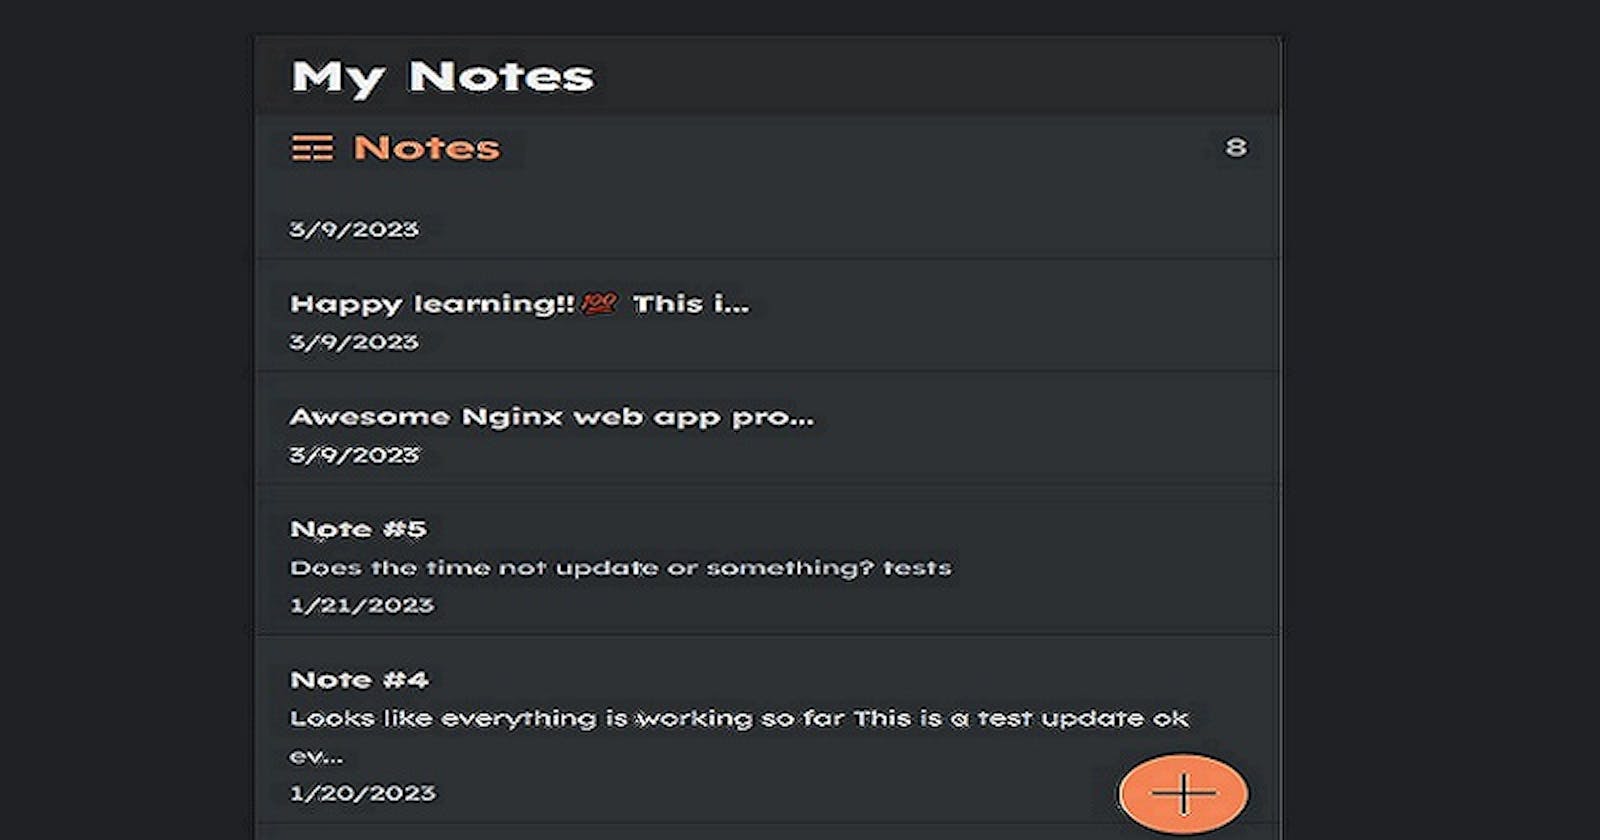
Step 12: Refresh the browser now, as the app is fully prepared to help you take notes for your upcoming goals to achieve.

Step 13: Also we can use this notes application through the DNS subdomain.


That's all our web application is deployed using the Nginx server.
Reference: see this video for more details.
Thanks for reading the article.
Hope it will help you.
Keep learning and hustling.
Stay tuned for next project.